Thursday, May 30, 2013

Produce Storage Tips

There is no doubt about it. Local is the best way to go in terms of providing your body with the essential nutrients it needs while still enjoying that fresh, crisp, just-picked taste.

Local produce is better for many reasons:
  • not sprayed with preservatives to make them last longer
  • designed for flavor and nutrient content rather than longer shelf life
  • YOU are supporting the local economy
  • YOU are helping to preserve our farmland
  • YOU KNOW THE FARMER THAT GROWS YOUR FOOD
With all of those reasons to buy local produce you have to know that all good things must come to an end and fresh food does not keep.

Being part of our CSA ensures that your weekly produce comes to you fresh picked. That doesn't mean it will last forever. I would be concerned if it did!

However, there are ways to help extend the shelf life of your precious produce!

Here is a few tips that work for everything in your share boxes:
  • Never wash any produce, especially berries, right away! I know it is tempting but washing right away will cause your fruits and veggies to spoil quickly. Only wash what you are intending to eat that day.
  • Keep your fruits and veggies in separate drawers in the fridge. A gas released by fruit, particularly apples, called ethylene can build up and cause spoilage.
  • Refrigerate as soon as possible. Once picked, many fruits and veggies need cooler temperatures to keep their crispy texture.
  • Basically, use all fruits and veggies as soon as possible. Whether you are eating them fresh or freezing them for later, always make your produce your first priority :)
Now here are some more specific tactics that will help you to prolong your produce!

Lets go alphabetically shall we?

APPLES: They are great keepers by themselves anyways but pop them in the fridge and they can last up to 3 months!

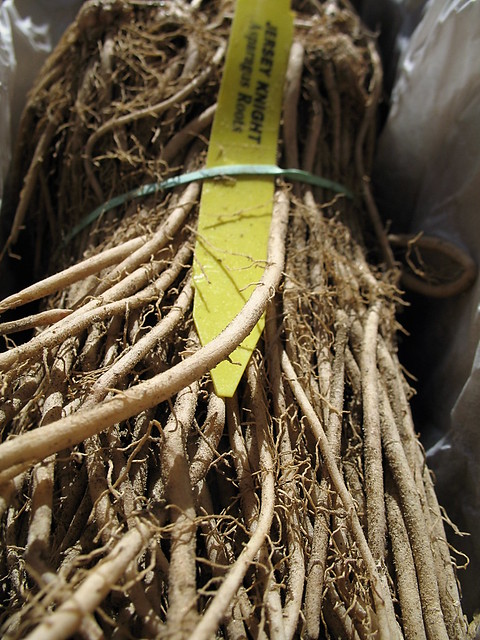
ASPARAGUS: Cut about 1 inch off the bottom and put them cut side down in a glass with a few inches of water in the refrigerator. Use within 3-5 days

BASIL & HERBS: Like asparagus cut a little off the bottom and place in a glass of water on your kitchen counter. Then place a loose plastic bag over the top. Do not tie shut! Keep out of direct sunlight. It will act as its own personal greenhouse! Use within 1 week.

BEANS: Place in a loose wrapped plastic bag. Do not seal. Place in crisper drawer in fridge.Use within 3-6 days.

BEETS: Another great keeper. Detach the tops (if any) and place unwrapped in the crisper drawer. Use within 2 weeks. The tops will last up to 3 days.

BLUEBERRIES: DO NOT WASH until ready to use. Always check for bad berries. One bad berry can spoil the box. Leave in container in fridge. Use within 2-3 days.

BROCCOLI: Place in plastic bag, lose, in the crisper drawer of your fridge. Keeps for up to 2 weeks.

BRUSSELS SPROUTS: Place in plastic bag, lose, in the crisper drawer of your fridge. Keeps for up to 2 weeks.

CABBAGE: Leave outermost leaves on. Place loose in the crisper drawer of your fridge. Keeps for up to two weeks.

CARROTS: Detach tops, if any, and place in a loose wrapped plastic bag in the crisper drawer. Use within 3-5 days.

CAULIFLOWER: Same as broccoli, place in plastic bag, lose, in the crisper drawer of your fridge. Keeps for up to 2 weeks.

CELERY: Place in a loose wrapped plastic bag in the crisper drawer of your fridge. Use within 1 week

COLLARDS: Place loose in your crisper drawer. You can remove the leaves from the center stem. Use within 3-5 days.

CUCUMBERS: Place in a loose wrapped plastic bag in your fridge. Use within 1 week.

EGGPLANT: Keep loose in crisper drawer. Use within 1 week.

GARLIC: DO NOT REFRIGERATE. Place in a cool dark place like a drawer or pantry.

KALE: Place in fridge in a loose wrapped plastic bag. Use within 4-6 days.

LEEKS: Place in fridge in the crisper drawer in a loose wrapped plastic bag. Use within 1 week.

LETTUCE: Do not wash before refrigerating. Wrap in a slightly damp paper towel in a loose plastic bag in the crisper drawer. Use within 5-7 days.

MELONS: Refrigerate in a separate drawer than other vegetables. Use within 1 week.

ONIONS: Keep in a cool dry in a bowl and not a plastic bag. Use within 1 month.

PEACHES: Keep on counter in a brown paper bag to speed up ripening. Place in fridge when they reach the desired ripeness. Keep away from other vegetables as they can increase spoilage. Use within 3-5 days.

PEPPERS: Place in a loose wrapped plastic bag in the crisper drawer. Use within 1 week.

POTATOES: Keep in a cool dry place and not in a plastic bag. Place an apple with your potatoes and it can help decrease spudding. Use within 1 month.

RADISHES: Remove tops and place in the crisper drawer. Use within 1 week.

SCALLIONS: Place in a loose wrapped plastic bag in the crisper drawer in your fridge. Use within 5-7 days.

STRAWBERRIES: Remove any berries that may have spoiled. DO NOT WASH until ready to eat. Place in the fridge away from vegetables. Use within 2-3 days.

SUMMER SQUASH: Place in a loose wrapped plastic bag in the crisper drawer in the fridge. Use within 1 week.

SWEET CORN: LEAVE HUSK ATTACHED to ensure moisture stays in the cob. Uses ASAP for maximum sweetness. Will keep for up to one week in the fridge with the husk attached.

SWEET POTATOES: Keep in a cool dry place not in a plastic bag. Use within 1 month.

TOMATOES: DO NOT REFRIGERATE! Keep on your kitchen counter. Stem side down will increase ripening speed. Place stem side up to speed up ripening. Use within 5-7 days.

WINTER SQUASH: Keep in a cool dry place not in a plastic bag. Use within 1 month.

ZUCCHINI: Keep in a loose wrapped plastic bag in the crisper drawer in the fridge. Use within 5-7 days.

If you have any questions about storing your produce please contact me at stonyhillcsa@gmail.com


Roasted Balsalmic Asparagus

I don't know about your but I am pretty sure I could put balsalmic vinegar on just about anything. But for some reason I especially love this on asparagus.

Here's a quick and easy recipe for Roasted Balsalmic Asparagus:

Ingredients:

  • 1 pound asparagus
  • 1 tablespoon olive oil
  • 1 tablespoon balsamic vinegar
  • 1/2 teaspoon salt
  • 1/2 teaspoon bottled minced garlic (milder in flavor)
  • 1/4 teaspoon black pepper

Instructions:
  • Preheat oven to 425 degrees
  • Snap off ends of asparagus by holding either end and bending until the stalk breaks,
 
  • Then place in the loaf pan
  • Drizzle with oil and vinegar and add the garlic. You can add as much or little as you'd like. I, personally like a little extra balsalmic and garlic :) My husband even likes to mix it up and add onion powder as well.

  • Toss to coat

  • Bake at 425 degrees for 10 minutes-12 minutes  depending on how crispy you like your asparagus. We actually like to eat ours raw!

  • Turn once to coat in oil, vinegar, garlic mixture.
    Enjoy!
     

Asparagus

Asparagus is one of our first crops of the spring season.

It is a perenial plant, meaning that it will come back every year. It takes about 2-3 years before we were able to harvest a crop from our fields but a single asparagus plant can provide a harvest for up to 20 years!


Asparagus is planted from crowns or 1-2 year old plants.


We know the asparagus is ready to harvest when the diameter is thicker than a #2 pencil.

Asparagus season for New Jersey begins in late May and ends in mid-late June.

The thickness of the spear does NOT dictate the woodyness of the plant. The closer wrapped the tops of the asparagus are the more tender the plant will be.

At the end of last season, when the spears become the diameter of a #2 pencil, we allow the plants to go to seed so they could come back next year.


The following spring we will then mow off the asparagus that has gone to seed. In its place new asparagus will then grow next year.


The best way to keep asparagus is to give the bottoms of the spears a fresh cut and place them in a glass with water and put them in the fridge.


Use within 4-5 days for maximum tenderness.

Check out our next blog entry for a tasty recipe using our fresh asparagus!


Saturday, June 1 CSA Boxes

Can you believe it is already time for our first CSA pick-up. The warmer weather was right on time to bring in some great fruits and veggies for your first boxes.


Here is what you can expect:

Half Share

quart  strawberries
bunch asparagus
bunch spinach
bunch lettuce
bunch swiss chard
bunch dill
bunch scallions
bunch radishes

Full Share
2 quart strawberries
2 bunch asparagus
bunch spinach
bunch lettuce
bunch swiss chard
bunch dill
bunch scallions
bunch radishes
bunch beets
bunch arugula
bunch kale

**these items are subject to change without notice**

Included in your first share box will also be a tote bag for easier transport of your weekly shares.
Just a reminder, here are the pick-up locations for Saturday (only pick up at the location that you selected)

  • Hell's Kitchen Farmers' Market (NYC): West 43rd St and 10th from 10am- 4pm
  • Garden Street Farmers' Market (Hoboken, NJ): 14th St and Garden Street from 9am- 2pm
  • Paulus Hook Farmer's Market (Jersey City, NJ): End of Washington Street next to Korean War Memorial from 11am- 4pm
When you show up to your first pick up please let a market employee know you are there to pick up your CSA box. They will ask you to inital that you have picked up your box.

We hope that you all enjoy your first CSA share of the season!

Have a great weekend everyone

Thursday, May 23, 2013

May 23rd CSA Update

A little over a week away for our Saturday CSA and exactly 2 weeks away from our Thursday CSA!

We are so excited to get this season started. Our crops are coming along nicely and we should be right on schedule with for our first week.

We would like to take the time to thank Murray Hill Health & Racquet Club in Murray Hill New Jersey for joining our list of pick up locations. They are allowing the public to pick up their shares at their convenient location on Thursdays starting on June 6. 

If you haven't yet signed up for our CSA and would like to become a member please fill out our application on our website and return to:
Stony Hill Farms
Attn: CSA
8 Route 24
Chester, NJ 07930
 
The last day to apply for Saturday Pick-Up is May 25 and the last day to apply for Thursday Pick-Up is June 1.
 
Dale and Brandt have been super busy with plowing, disking, and transplanting. Peppers and eggplant went in this week as well as beans, sweet corn, tomatoes, lettuce, zucchini and cucumbers. We still have a few more beds to lay as well. Peaches are also getting thinned. Carol has also been busy seeding some of our later crops. 
 
I hope you all are safe during this crazy weather today!


Wednesday, May 15, 2013

Protecting our Crops from Frost

Unfortunately, this season we are experiencing a chilly spring. Most of our cold crops like cabbage, kale, collards, lettuce, broccoli, and cauliflower do not mind a little frost.

However, tomatoes, sweet corn, and strawberries can become damaged even after the shortest exposure to lower temperatures.

To help protect them from the occasional spring frost, we cover our tomatoes with a thin cloth that keeps the frost from coating the leaves.

Some of our larger crops like strawberries and sweet corn are too big of an area to cover. To protect them we use sprinkler systems.

Early in the morning, before the frost arrives, we turn on the sprinklers. Constant water flowing over the crops help to keep the frost from setting in the leaves and burning them.


The frost date for Northern New Jersey is May 15th but we always keep an eye out for falling temperatures even until the beginning of June.

Direct Seeding

There are some crops we plant by direct seeding or planting the seed into the ground instead of as a seedling.

We do this for a couple of reasons:
  • certain plants do not need warmer soil to germinate
  • taproot crops like carrots, radishes and beets need to root directly into the soil it is growing in
  • it is simply easier and more economical to direct some seeds like sweet corn that can average 100,000- 200,000 seeds per acre!
Most of our direct seeded crops are planted by hand.

Zucchini is being planted here:


The only crops that are not seeded by hand are winter squash, beans, peas, and sweet corn. Those are planted by a planter pulled by a tractor that plants multiple rows during one pass.

Sugar snap peas
Taproot crops like soft, fluffy soil to grow in. This year we made raised beds with trees that fell from Hurricane Sandy and filled them in with top soil.

Planting Carrots:

Brandt planted carrots in late April into this raised bed. Carrots grow well in these raised beds because the soil allows them to grow straighter and longer.

He used a hand seeder to do this
 He first measures the bed and determines where to start his first row. Plants need sufficient spacing in order to grow and mature.
He then places the seed into the seeder.
Then he begins his first row. The seeder makes a trough for the seed, deposits the correct amount of seed, and covers the trough with a loose layer of soil.
There is an arm that marks the soil to show where the next row is to be started.
He repeats this process until the entire bed is filled.
This seed will take a few weeks to germinate. By mid-June we should start to pick these carrots!
Our dog Bailey likes to supervise and make sure Brandt's rows are planted straight.


Sunday, May 12, 2013

Transplanting Seedlings

Now that our beds are made, it is time to plant our seedlings from the greenhouse.

These seedlings have been hardened off meaning that they were moved from a warmer greenhouse to a cooler greenhouse to prevent shock when transplanting.

First, we plant our "cold crops" like cabbage, cauliflower, broccoli, kale, and collards.

We have an implement called a transplanter and it consists of 2 water tanks, a planting wheel, two seats, and trays for the seedlings.

To begin the tractor runs at a low range. The planting wheel punctures the plastic and places a small amount of water in the opening, just enough to moisten the soil and hold the seedling.  The wheel also keeps the seedlings evenly spaced in the row. There are two wheels that make two rows per bed.


Next the planters ready the seedlings for transplanting. The trays in front of them hold several trays at a time. They pull the trays onto their lap and push each seedling out from the bottom.
As the planting wheel goes over the plastic and puntures holes, the planters then place each seedling into each hole. They must go at a relatively fast pace to keep up with the speed of the tractor.


At the end of each row, the tractor driver lifts the planters up.....

And begins again on the next row.
In just a few short weeks, the transplants have already grown quite a bit.


Other crops are transplanted by hand, like onions.

 We plant onions on reflective plastic to repel buts called thrips.


As the weather warms up we are starting to plant more and more. Pretty soon we will have all of our crops in for the year. This spring has been a cold one and the lower temperatures have prevented us from planting the crops that need warmer weather.